Table of Contents
[vc_row 0=””][vc_column][vc_column_text 0=””]
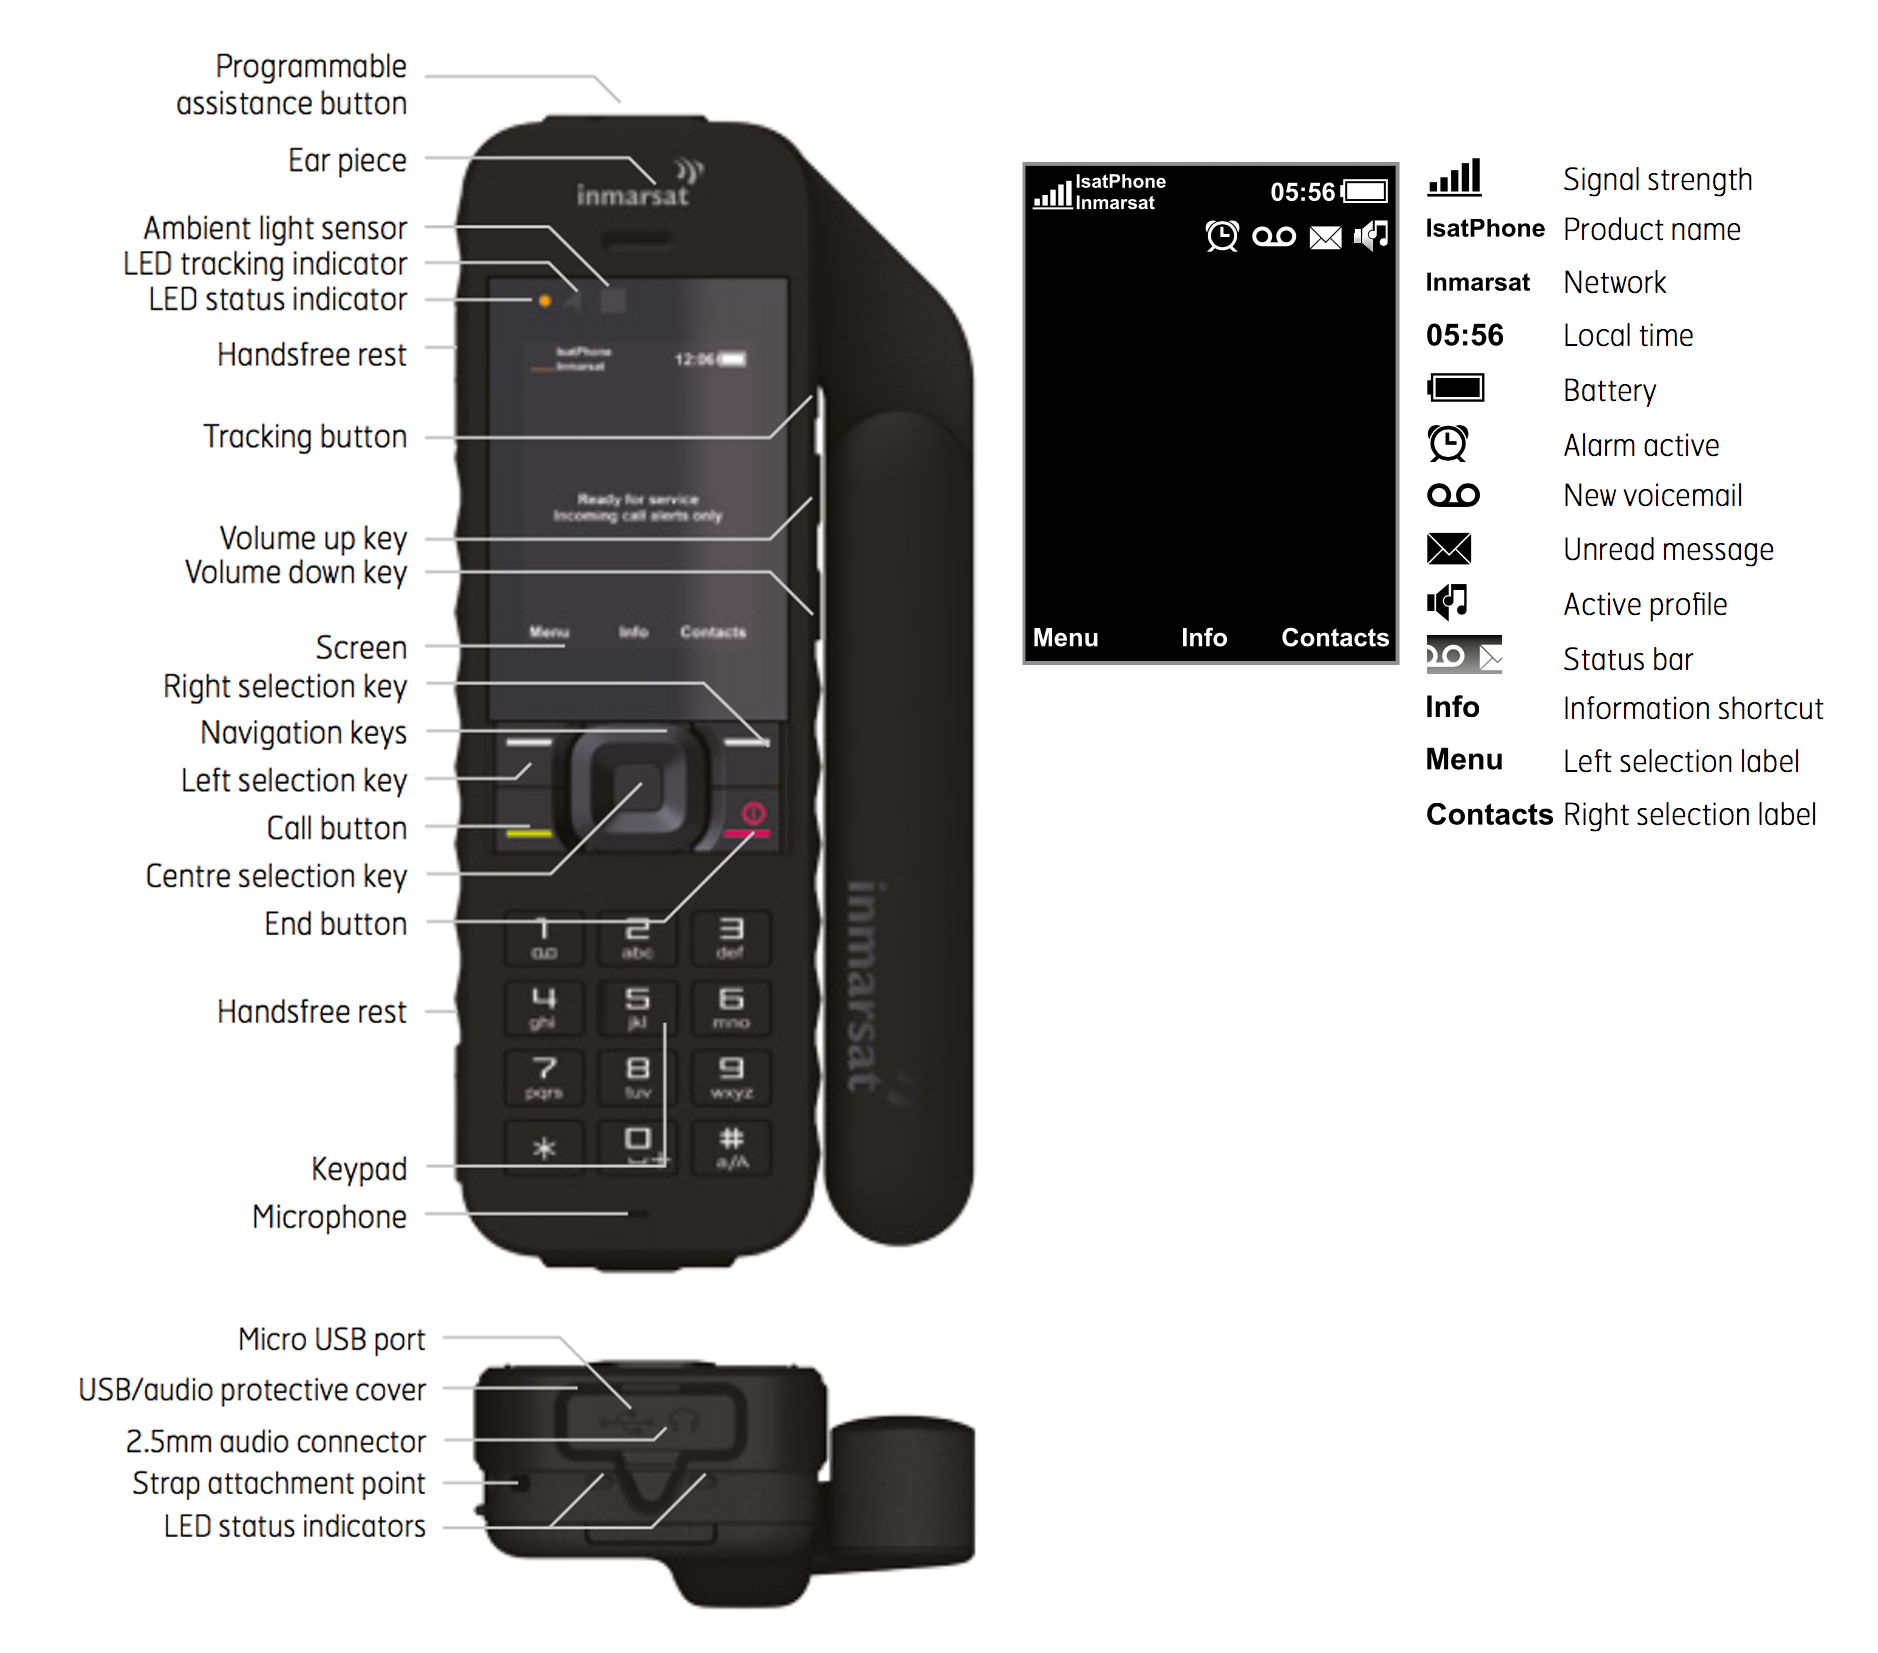
IsatPhone 2 Satellite Phone
Step Two
Step Three
Note
IsatPhone 2 Satellite Phone
Quick Start Guide #
IsatPhone 2 @ Apollo Satellite Communications
Step One
Insert the SIM Card

- If the battery is in place, lift it out
- Slide the catch down on the SIM holder and flip it outwards
- Make sure the angled corner of your SIM card is on your left and slide it into the holder
- Flip the holder back into place and slide the catch back up
- Insert the battery in the IsatPhone 2 Satellite Phone
Step Two
Charge the Battery
and Switch On #
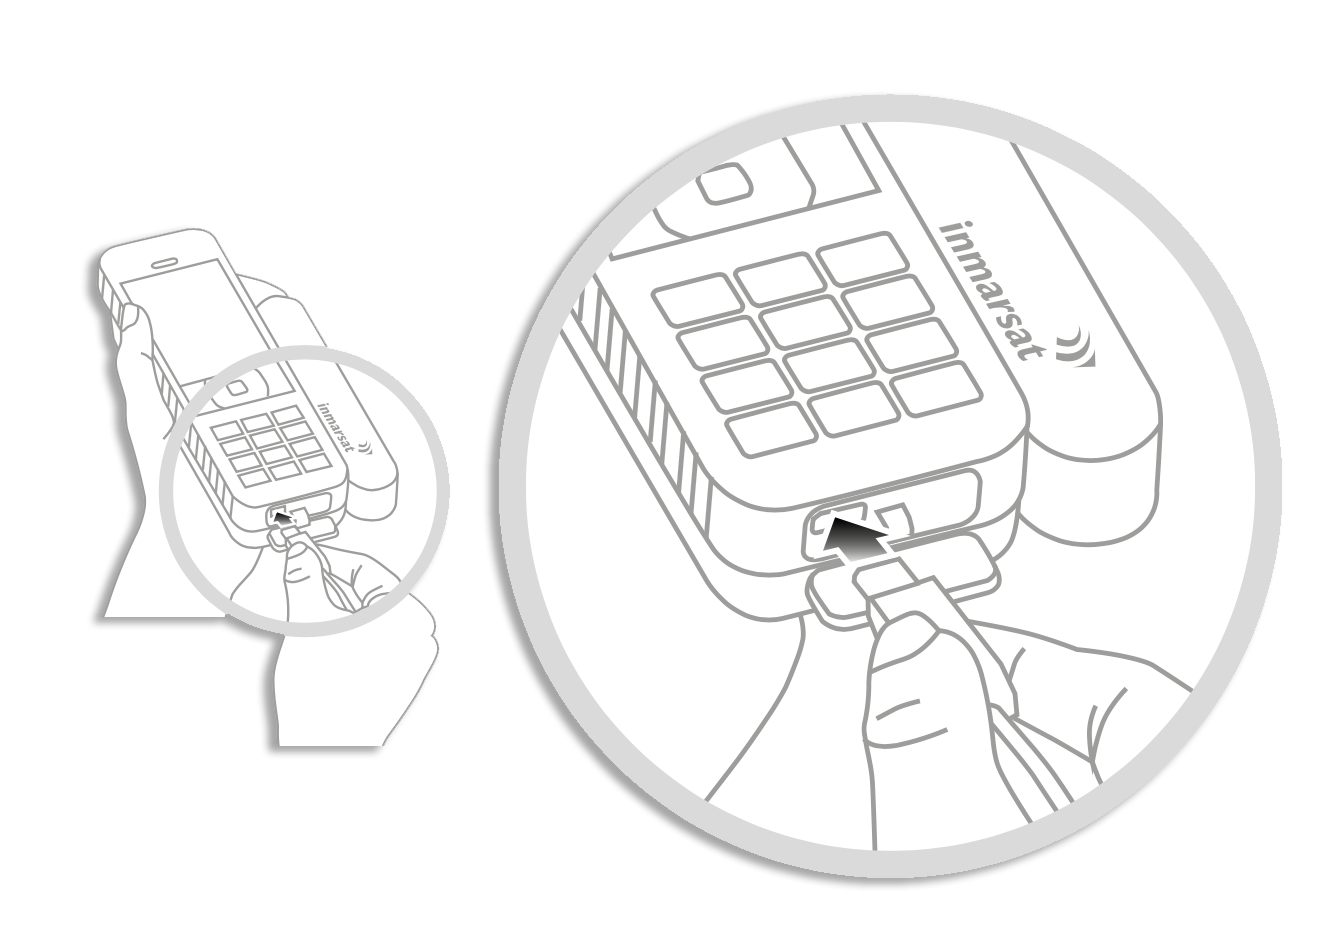
- Connect the charger to a power source and the micro USB connector to the port at the base of the phone
- Hold down the red key until the screen lights up
- The first time you use your phone, use the navigation keys to select your language and set the time zone
- To switch off, hold down the red key until the screen shuts down
Step Three
Connect to the Satellite #

- Stand outside in a place where there are no obstacles between you and the sky
- Fully deploy the handset antenna and point it upwards
- To register to the Inmarsat network, your handset must acquire a GPS fix and simultaneously find the Inmarsat network – this happens automatically
- When the handset is registered to the network, the name Inmarsat is displayed beside the signal strength indicator
- To send and receive calls, at least two indicator bars must be filled – if the signal strength is too low, on-screen instructions will help you to improve it
Note
GPS Fix #

- Before you make a call, your phone needs a GPS fix so it can be located by the satellite – this happens automatically, but if a new GPS fix is needed the red icon above will be displayed – place the phone in the open with a clear view of the sky until the icon disappears
Make a Call #

- Enter the full international number by pressing +, country code, area code (without the leading zero), telephone number, and then press the Green Key – Example (+44 1621 123456)
- To end the call press the Red Key
Answer a Call #

- When your phone rings, press the Green Key
- Remember, to receive a call, you must be connected to the satellite with the phone antenna pointing upwards
Listen to Voicemail #

- Hold down the “1” key (pictured above) and you will automatically be connected to your voicemail
- Alternatively, call +870 772 001 899 and press the Green Key
Incoming Call Alerts #
- The handset has the capability to alert you to incoming calls and text messages when the antenna is stowed or the satellite signal reception is limited
- Whenever you switch the handset on and deploy the antenna, the handset attempts to register to the network (see “Connect to the Satellite” above)
- If successful, the screen displays “Ready for Service” and the two status LEDs change to green
- After successful registration, you can stow the antenna
- The status LEDs will change to amber to show that the handset is monitoring the network for incoming call alerts


