Inmarsat iSavi LED Status Reference Guide #
[/vc_column_text][vc_separator el_width=”40″][vc_column_text css=”.vc_custom_1538068722830{margin-right: 20% !important;margin-left: 20% !important;}”]This is your one stop for getting information for your Inmarsat iSavi LED status light codes. If you are having any difficulties or simply have any questions, please feel free to contact us: Apollo SatCom Contact
[/vc_column_text][/vc_column][/vc_row][/vc_section][vc_section][vc_row][vc_column][vc_column_text]|
No. |
Power Button |
Antenna Pointing LEDs |
Exit Pointing |
State |
|
1 |
|
|
 |
SIM not detected. |
|
2 |
|
|
 |
Audio Pointing Mode ON – Global beam is available. |
|
3 |
|
 |
 |
Audio Pointing Mode ON – Global beam is not available. |
|
4 |
|
 |
 |
Network registration failure. |
|
5 |
|
 |
 |
Safe mode is enabled. |
|
6 |
|
 |
 |
Global beam is not available. |
|
7 |
|
 |
 |
GPS not available (timeout). |
|
8 |
|
 |
 |
Magnetic interference detected. |
|
9 |
|
 |
 |
Data activation failure. |
|
10 |
|
 |
 |
Powering down. |

 [/vc_column_text][/vc_column][/vc_row][vc_row][vc_column][vc_separator el_width=”90″][vc_single_image image=”14741″ img_size=”full” alignment=”center” onclick=”custom_link” link=”https://apollosatellite.com/products/wideye-isavi-global-bgan-satellite-hotspot”][vc_separator el_width=”90″][/vc_column][/vc_row][vc_row][vc_column][vc_column_text]
|
No. |
State |
Power Button |
Antenna Pointing LEDs |
Exit Pointing |
Actions/Remarks |
|
1 |
Off |
|
|
 |
Terminal is Off |
|
2 |
Power On |
|
|
 |
Turn On by pressing the Power Button for 5 seconds. The Antenna Pointing LEDs will turn on in Red/Amber for about 4 seconds, followed by all in Green for approximately 30 seconds before going into the next state. |
|
3 |
Firmware Loading |
|
 |
 |
Powering up in progress – this may last up to 30 seconds. |
|
4 |
GPS Acquiring |
|
 |
 |
This LED state (Antenna Pointing LEDs in Amber) is only applicable for first time fresh terminal setup. The GPS acquisition will take 30 seconds to 5 minutes depending on each setup location. |
|
5.1 |
LED Visual Pointing |
|
 |
 |
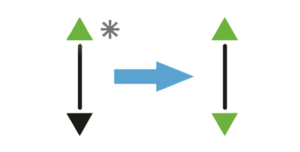
Tilt your iSavi in upward direction (follow “Up” LED flashing green light). Stop when both “Up” and “Down” LEDs are solid green. |
|
5.2 |
LED Visual Pointing (continued) |
|
 |
 |
Tilt your iSavi in downward direction (follow “Down” LED flashing green light). Stop when both “Up” and “Down” LEDs are solid green. |
|
5.3 |
LED Visual Pointing (continued) |
|
|
 |
Turn your iSavi in clockwise direction (follow “Left” LED flashing green light). Stop when both “Left” and “Right” LEDs are solid green. |
|
5.4 |
LED Visual Pointing (continued) |
|
|
 |
Turn your iSavi in counterclockwise direction (follow “Right” LED flashing green light). Stop when both “Left” and “Right” LEDs are solid green. |
|
6 |
Exit Pointing |
|
 |
 |
All Antenna Pointing LEDs are solid green, Azimuth and Elevation are in correct positions. Press the flashing Exit Button once to exit Antenna Pointing mode and register to the network. Note: Pressing the Exit Button for 3 seconds will put your iSavi into the alternative Audio Pointing mode. |
|
7 |
Network Registration |
|
 |
 |
Satellite network registration. This process will take around 30 seconds. |
|
8 |
Ready for Service |
|
 |
 |
Network registration successful and ready for service. All LEDs will turn off after about 1 minute. Note: When all LEDs are off, you can always check the LED state by pressing the Exit Button once. |
|
9 |
Data Activated |
|
 |
 |
Data activated successfully through web console/Control app. You can now connect your smart devices to your iSavi terminal and start accessing the Internet. Note: For LED status check, you can always press the Exit Button once. |

 [/vc_column_text][/vc_column][/vc_row][/vc_section]


